

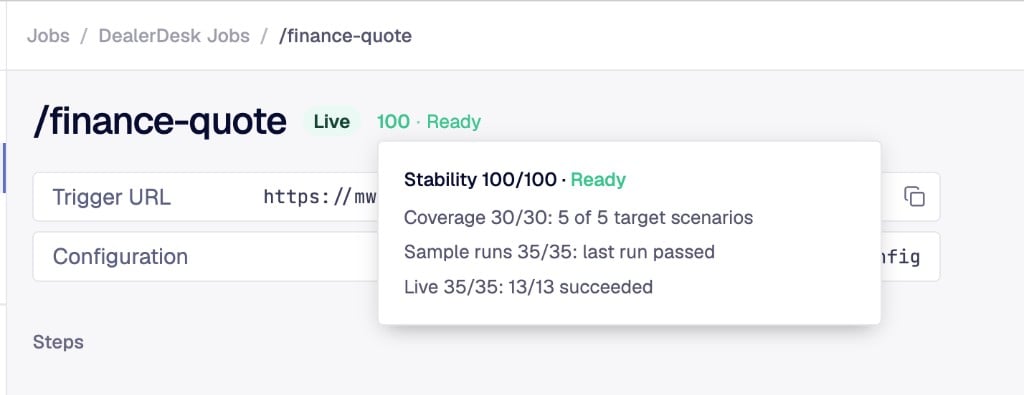
How the score is computed
The score is the sum of three components.
A job with 5 samples, a fully green latest run, and 50 successful live calls scores 100. A freshly taught job with one passing sample sits much lower, which is the honest answer.
Readiness tiers
The tier is the plain-language version of the score.What stability does and does not do
Stability informs, it never blocks. You can take an unproven job live; the Promote to live dialog will tell you the score and suggest adding scenarios first, and then it will do what you asked. The score moves for exactly the reasons you would want it to:- Teaching more samples raises coverage.
- A green run of all samples raises the sample component; a red one lowers it.
- Successful live traffic accumulates toward proven; failures pull the live component down.
If you want a higher score, do not chase the number. Teach the edge cases you are worried about and run the samples. The score follows the evidence.